MCP setup
This page covers wiring an MCP-compatible AI client to the DBConvert Streams MCP server. For what the integration gives you and what it can do, see AI Clients (MCP).
Using AI Chat inside DBConvert? You do not need this page. AI Chat supplies its internal MCP connection automatically; see AI Chat.
See it in action — Claude explores a PostgreSQL database and finds suspicious payments, in plain English (1:10):
Which transport to use
The MCP server speaks two transports. Pick by where DBConvert Streams runs relative to your AI client — the rest of this page is organized the same way.
| Your setup | Transport | How to connect | Who runs the server |
|---|---|---|---|
| Desktop app (local) | stdio | AI Clients panel — one click | your AI client launches the binary on demand |
| Docker / server (local or remote) | HTTP | Connect a remote AI client — http(s)://<host>/mcp | the Docker stack runs it as a service (behind nginx) |
Rule of thumb: desktop app + external AI client → stdio (the AI Clients panel
does it for you); Docker or a remote host → HTTP. With Docker, stream-mcp
already runs as part of the deployment — your client just points at /mcp.
Prerequisites
- DBConvert Streams installed and launched at least once.
- First launch generates the secrets master key in your OS keyring. The desktop setup resolves it and supplies it to the local MCP launch automatically.
- MCP reads the same workspace your Data Explorer shows — same connections, same streams.
- It can only read connections, not create them — so add at least one in Data Explorer first, or the AI has nothing to inspect.
- An MCP-compatible AI client:
- Cursor
- VS Code with GitHub Copilot agent mode
- Windsurf (Codeium)
- Claude Code (CLI)
- Claude Desktop (macOS / Windows; on Linux only via the community build aaddrick/claude-desktop-debian)
- OpenCode
- Codex CLI (OpenAI)
- Antigravity CLI (Google)
stream-mcpbinary. Ships with the desktop installer next to the other backend services. You don't need to know its location for the UI flow below.
The fast path: AI Clients panel
The DBConvert Streams desktop app exposes a one-click setup panel for every supported AI client.
- Open DBConvert Streams.
- In the left sidebar, click AI Clients (puzzle-piece icon).
- You'll see one card per client with a status badge:
- Connected — already wired up, click Disconnect to remove
- Available — installed but not yet registered, click Connect to wire it up
- Not installed — the client wasn't detected on this machine; the card shows where to download it
- Click Connect on the client you want to use.
- The desktop app spawns
stream-mcp installunder the hood, passing the same workspace database and master key that powers Data Explorer. The output shows up under "Last action output" with the registered configuration. - Restart the AI client so it picks up the new server entry. The exact step for your client (e.g. "Restart Cursor", "Open a new claude session") is printed in the Last action output box, which expands automatically right after you Connect.
- Open a new chat in the client and ask:
You should see the same connections that appear in Data Explorer.List my DBConvert connections.
To remove the integration later: click Disconnect on the same card, then restart the AI client so it actually drops the server. Just like connecting, a client that's already running keeps the MCP server alive until you restart it — so right after Disconnect, /mcp (or the client's server list) will still show dbconvert-streams connected until the restart.
✅ That's it. The AI Clients panel handles everything: detecting your clients, pointing them at the right workspace, the master key, and the restart instructions.
Running DBConvert Streams in Docker or on a server instead? Skip the panel and use the HTTP transport below.
Verify
Two checks, easiest first.
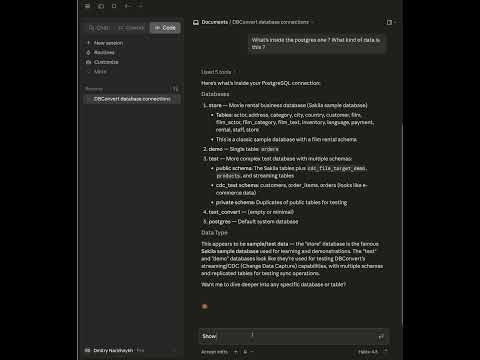
1. Ask it something — the real test. Open a new chat in your AI client and send:
List my DBConvert connections.
You should get back the same connections Data Explorer shows.
2. Confirm the server is registered. Where you look depends on the client:
- AI Clients panel (desktop app) — the client's card shows a Connected badge.
- Claude Code — run
/mcpand look fordbconvert-streams. - Claude Desktop, Cursor, VS Code, Windsurf, Antigravity, Codex, OpenCode — open the client's MCP server picker and check that
dbconvert-streamsshows a connected status.
Connect a remote AI client (HTTP)
When DBConvert Streams runs in Docker — whether on a remote server or locally on your machine — use the HTTP transport, not stdio. The Docker stack already runs stream-mcp as a service behind the same nginx that serves the UI, so there's nothing to install on either side. The endpoint is your host plus /mcp: http://localhost/mcp for a local Docker stack, https://<your-host>/mcp for a server.
It's the same host as the UI. nginx routes /mcp to the MCP service internally, so there is no extra port to open — the MCP container's port stays inside the Docker network; you only need the standard 443.
Authentication is your API key + Install ID, sent as request headers (X-API-Key / X-Install-ID, or Authorization: Bearer <api-key>). The server resolves your account from them per request — no master key, no local secrets file.
Easiest path — the web UI:
- Open the DBConvert Streams UI in your browser → AI Clients.
- Pick your client. Cursor and VS Code have a one-click Add button (a deeplink — the client adds the server itself); the others give a copy-paste config (or one command) in that client's format.
- The panel fills in the endpoint, your API key, and Install ID automatically.
Manual example (Cursor ~/.cursor/mcp.json):
{
  "mcpServers": {
    "dbconvert-streams": {
      "url": "https://your-host/mcp",
      "headers": {
        "X-API-Key": "<your-api-key>",
        "X-Install-ID": "<your-install-id>"
      }
    }
  }
}
Use HTTPS. The API key travels in a header, so plain HTTP would expose it. Install with
--secureto enable TLS (the installer generates a self-signed certificate for your host's IP or domain). With a self-signed cert, some AI clients reject the connection — prefer a real domain with a trusted certificate, or configure the client to trust the cert. See Docker deployment for cert and IP handling.
The HTTP endpoint is read-only like stdio, and serves a single workspace (the first authenticated account); a request for a different account is rejected.
What you can do next
- See real end-to-end sessions: plain-English SQL and federated validation.
- Browse the full read-only toolset in the Tools reference.
- Understand what the AI can and cannot see in Safety & privacy.
- If anything goes wrong, see Troubleshooting.